> ## Documentation Index
> Fetch the complete documentation index at: https://sequence-0fb8d9e6-relayer_docs.mintlify.site/llms.txt
> Use this file to discover all available pages before exploring further.
# Stytch Configuration for Embedded Wallet
> Learn how to configure a Stytch client for your Embedded Wallet instance. Follow steps to create and retrieve a Public Token from the Stytch dashboard.
In order to have Stytch auth integrated into your Embedded Wallet instance, you have to configure a Stytch application in the [Stytch Dashboard](https://stytch.com/dashboard) and configure an Embedded Wallet in [Sequence Builder](https://sequence.build/). Begin, by starting with the following below steps:
The Stytch authentication is currently in early access. To enable them, please visit [https://sequence.build/earlyaccess](https://sequence.build/earlyaccess) and turn on the functionality.
First access the [sign in page](https://stytch.com/dashboard):
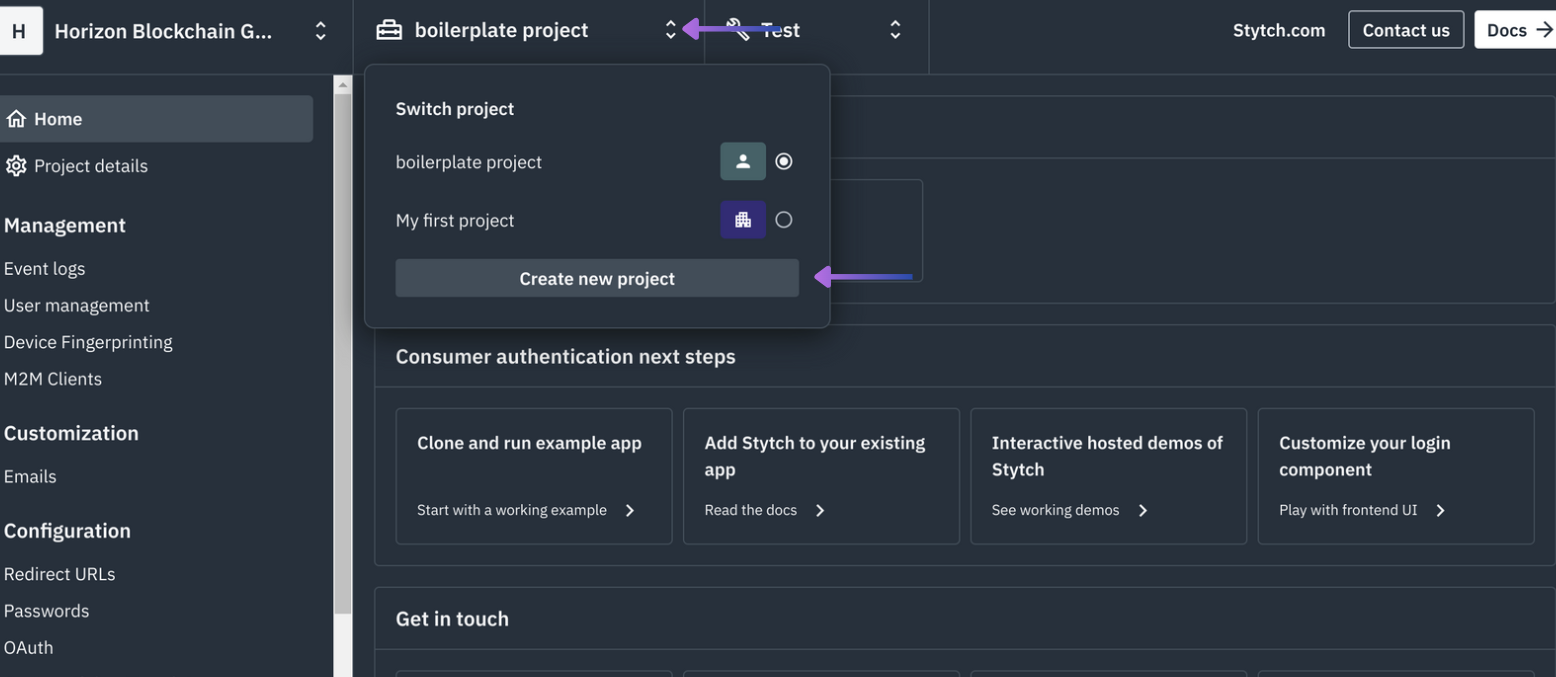
From the dropdown of projects once signed in, select `Create new project`:
 Then select `CONSUMER AUTHENTICATION`:
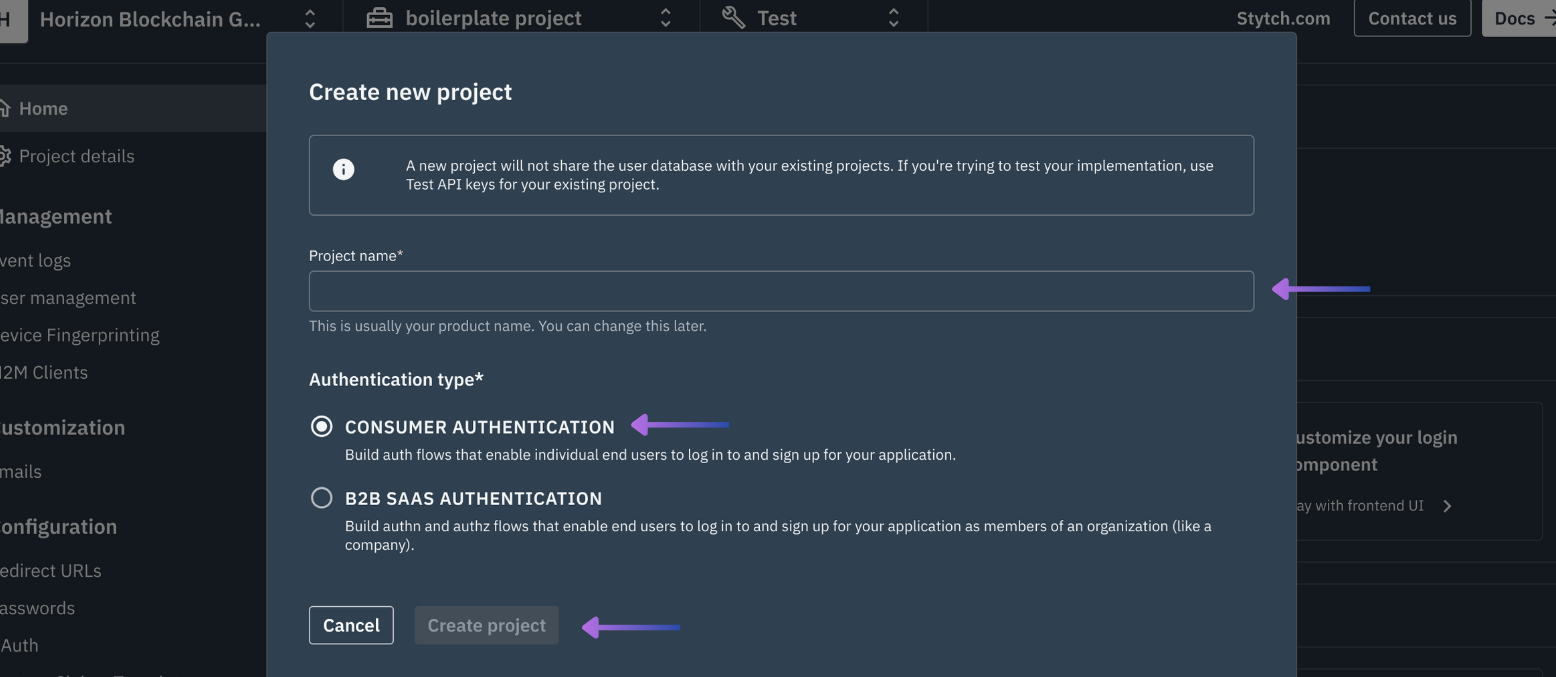 And finally select `Create project`
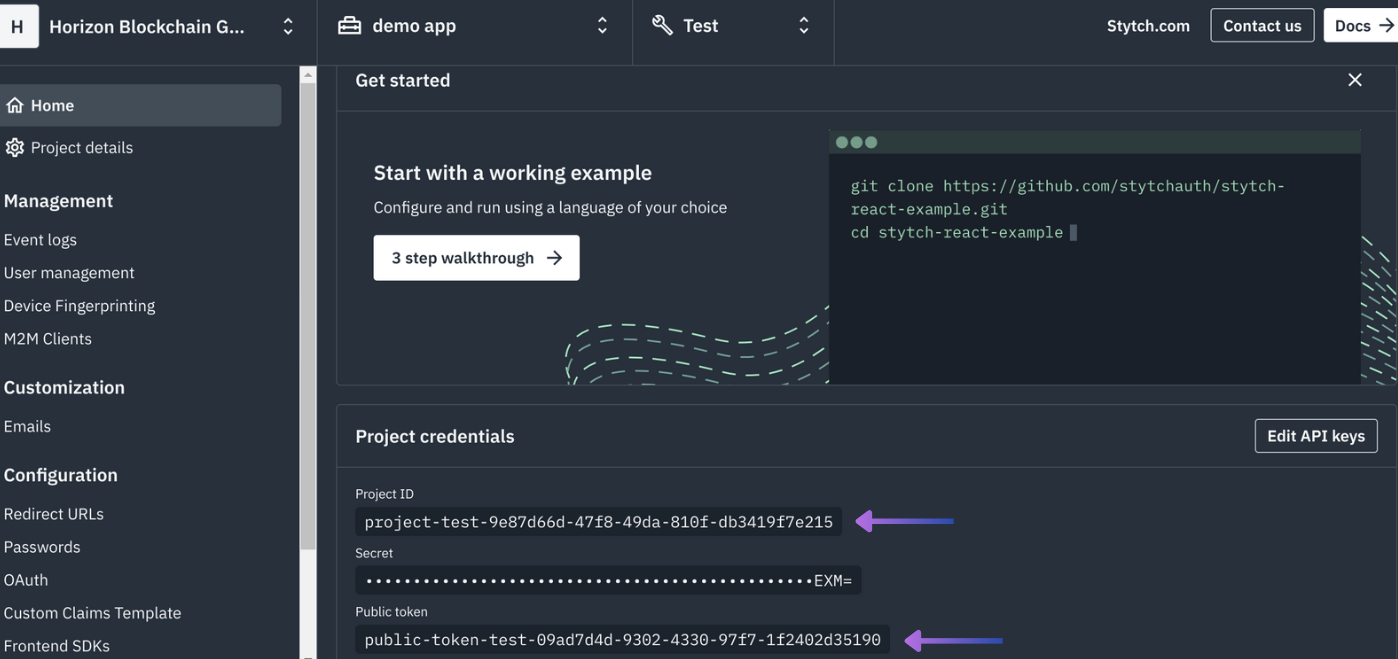
From the bottom of the first screen of `Home` copy and save somewhere safe the `Stytch Project ID` & `Stych Public Token`:
And finally select `Create project`
From the bottom of the first screen of `Home` copy and save somewhere safe the `Stytch Project ID` & `Stych Public Token`:
 For local development use `http://localhost:4444/authenticate`
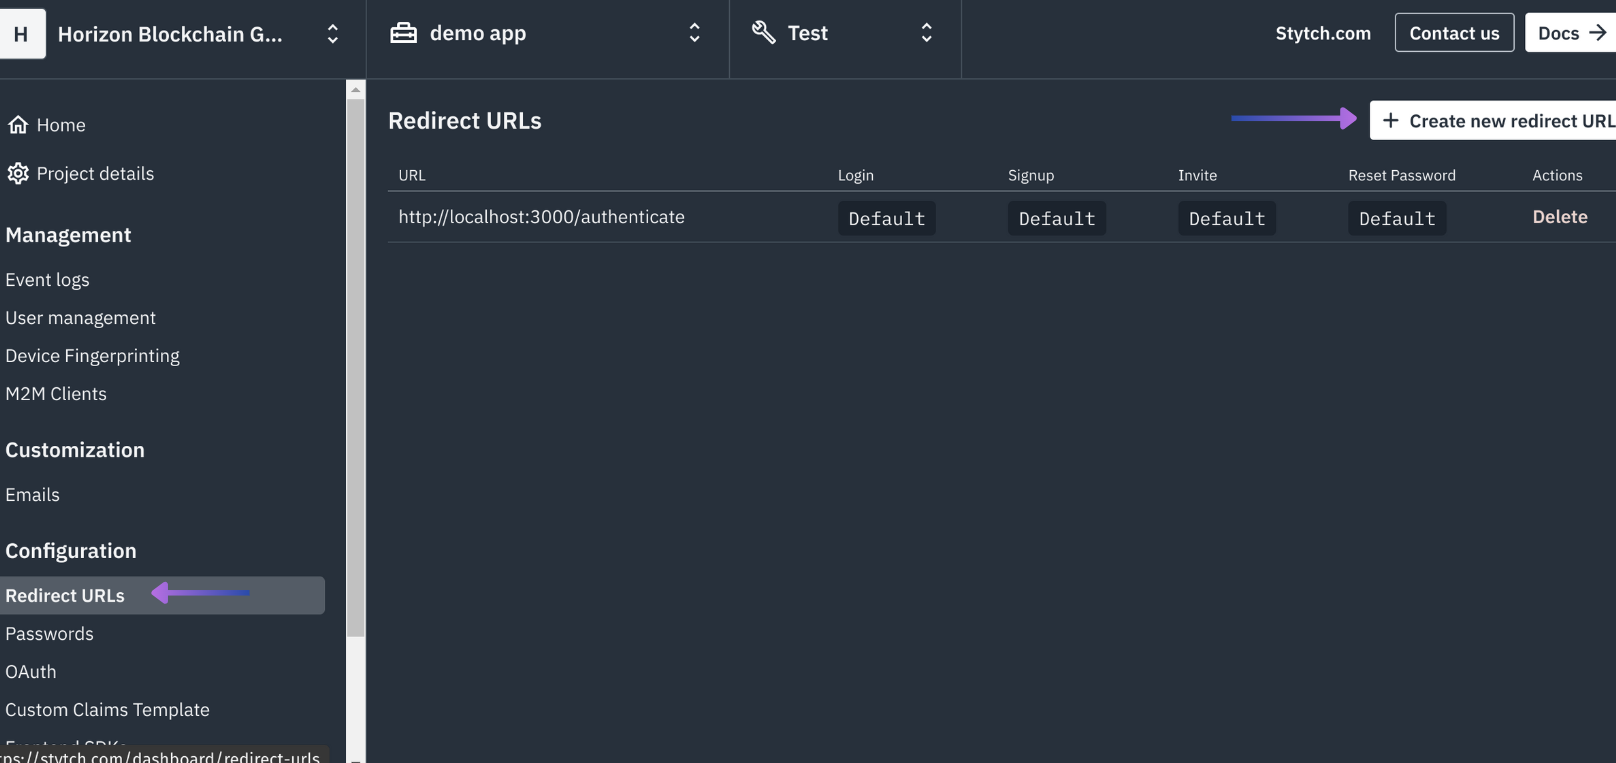 Enable `Login` and `Register`, select `Set as default` and select `Confirm`:
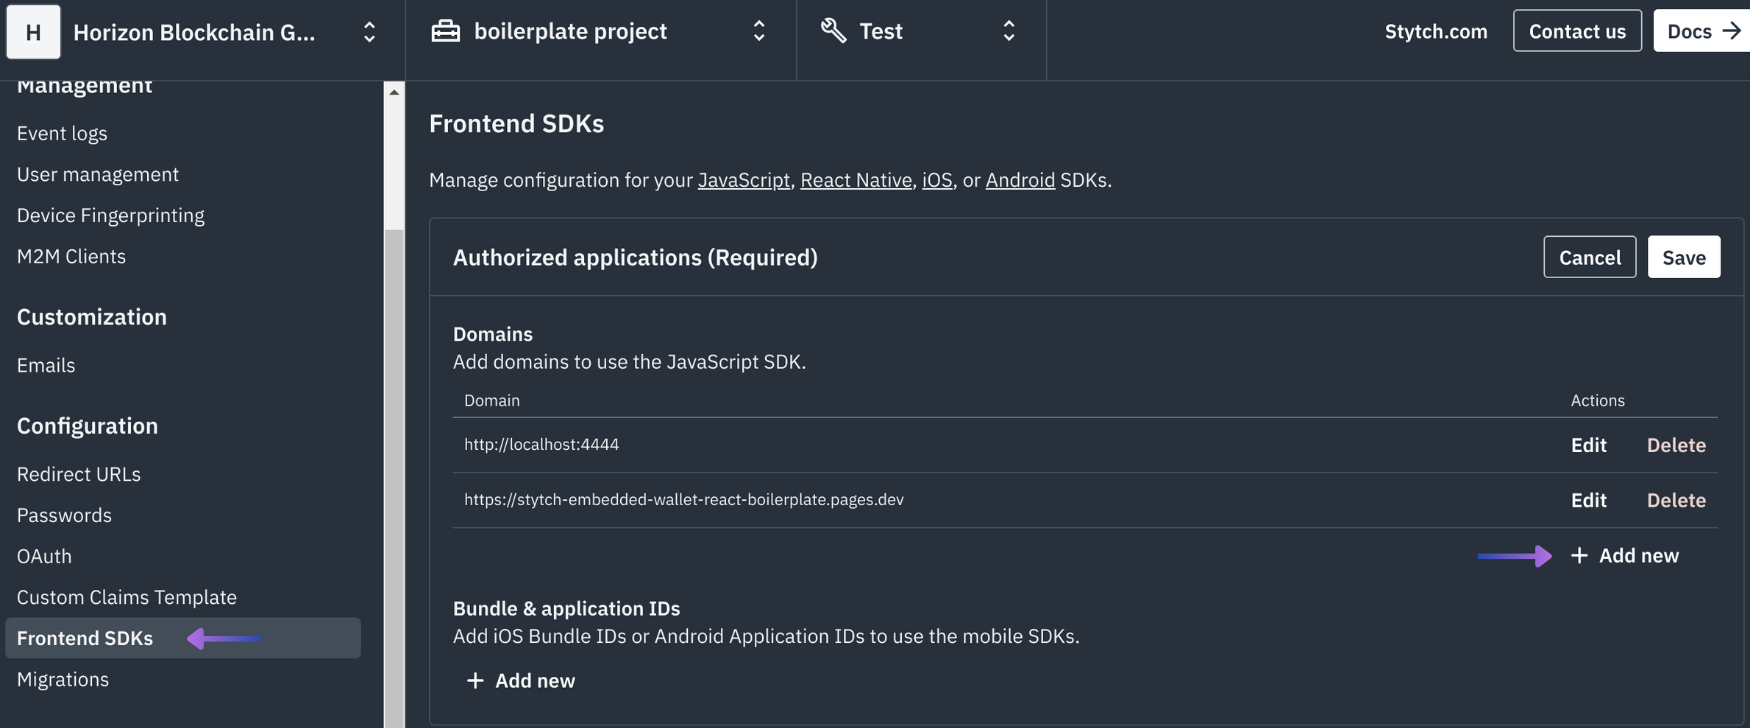
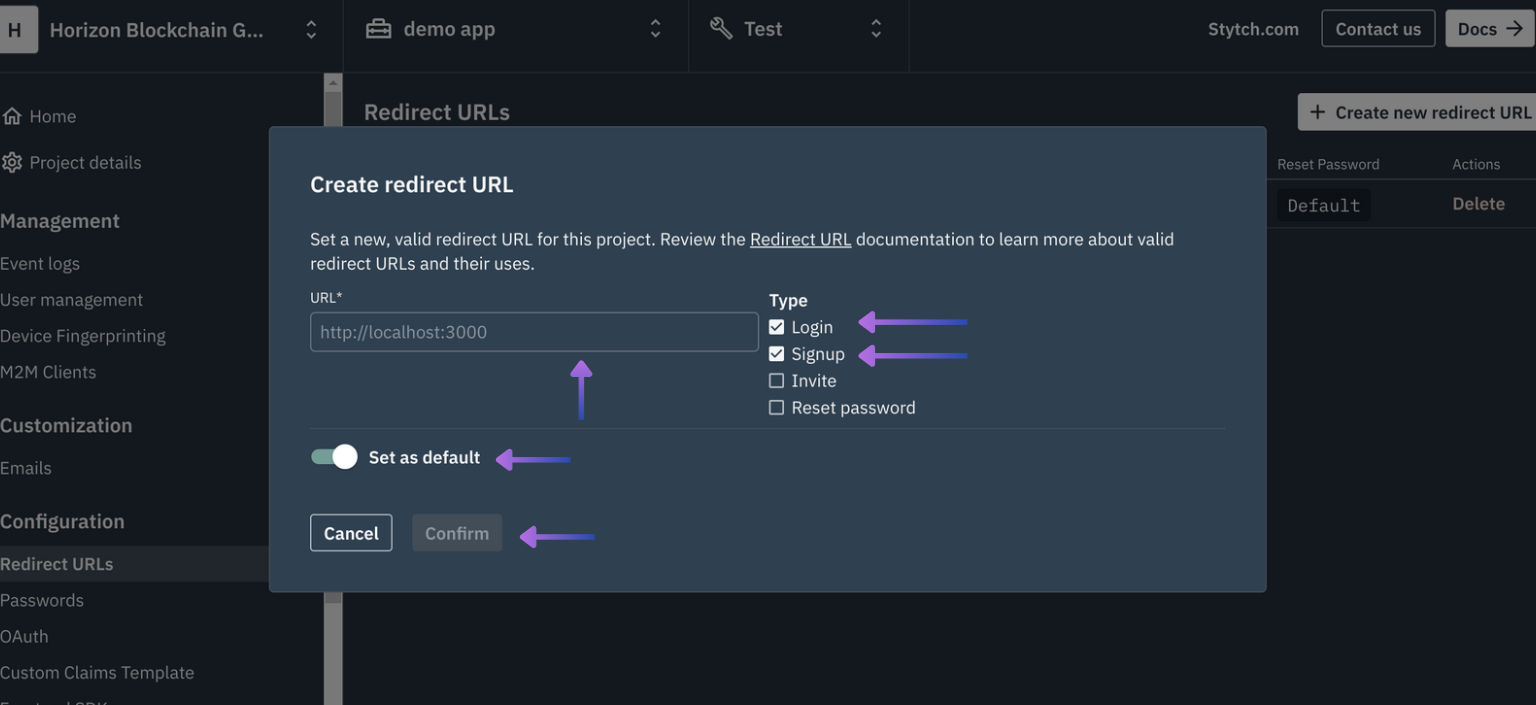 For local development, ensure that your development URL is passed correclt such as `http://localhost:4444`
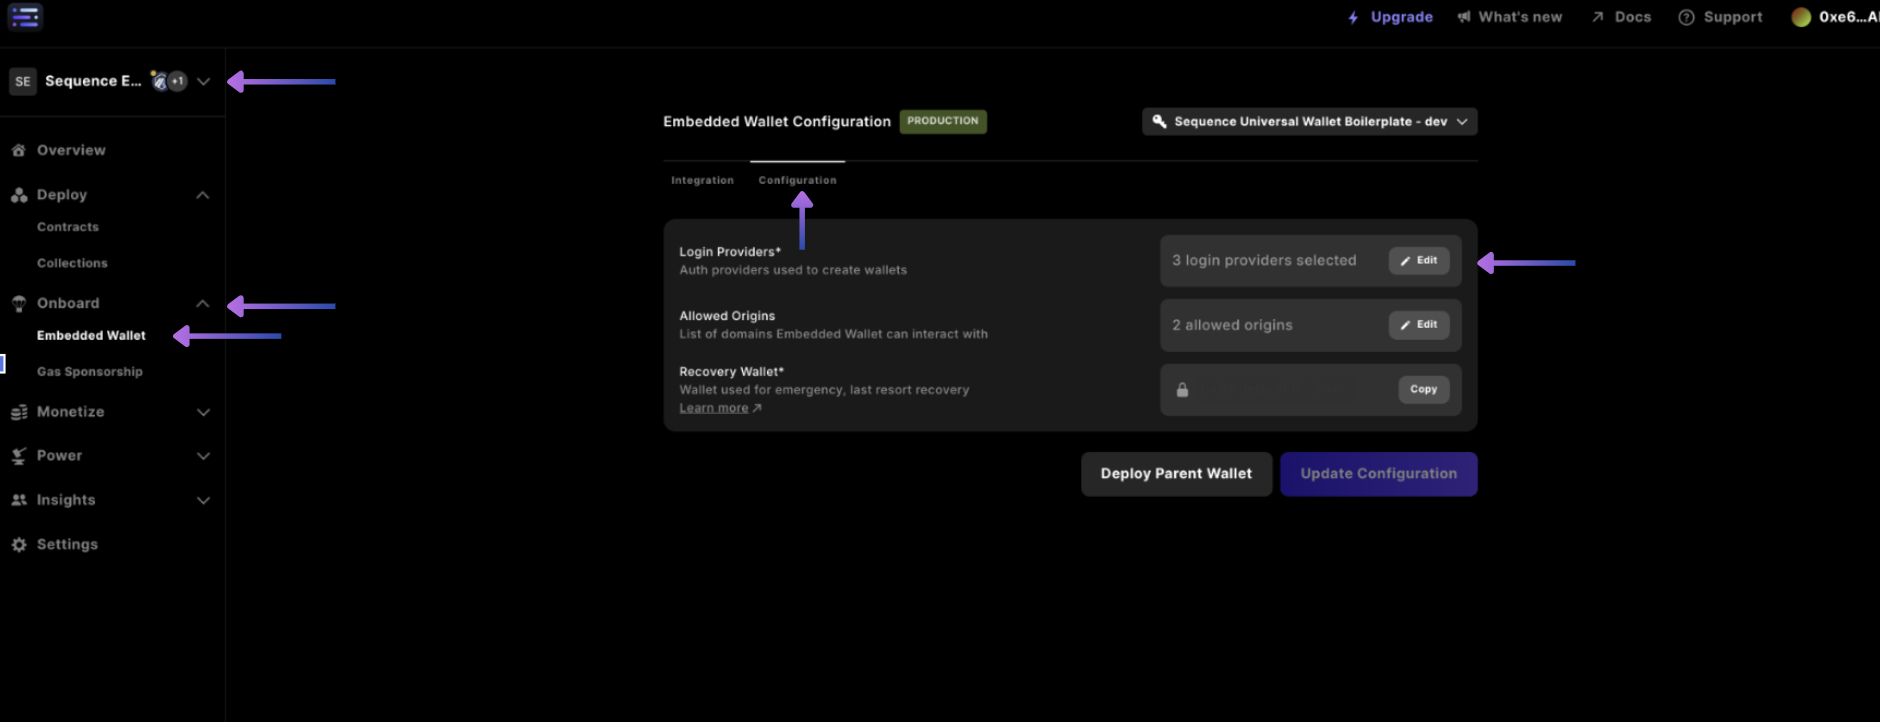
 Next, enable Stytch authentication in the Sequence Builder by accessing your Project, the Embedded Wallet Configuration section, then adding a Login Provider:
 Finally, selecting `Stytch` in the dropdown.
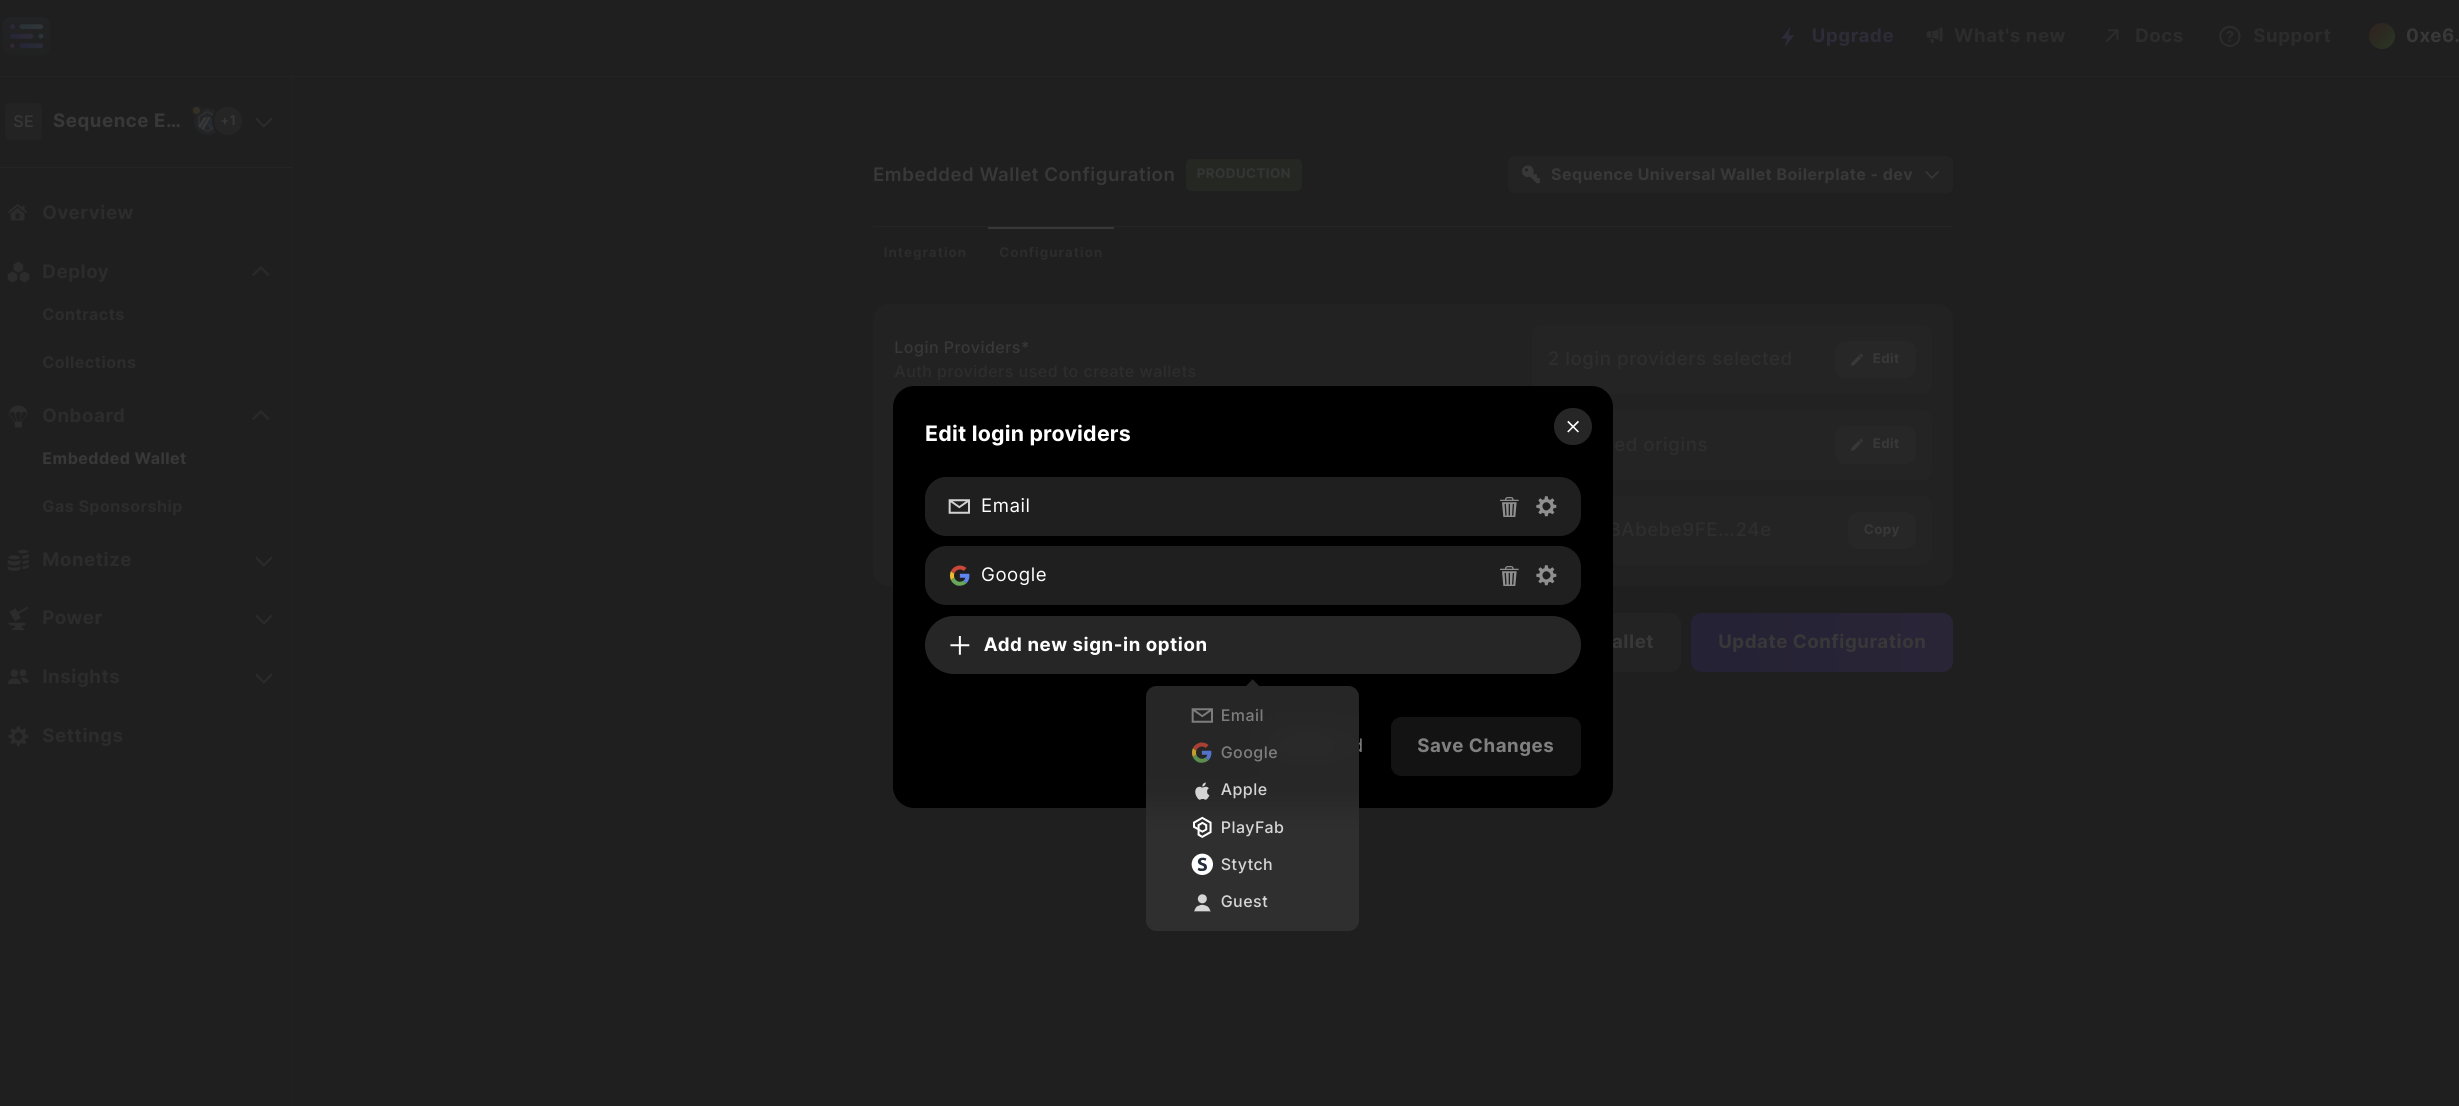 Then inputting your `Stytch Project ID`, selecting `Save changes` and selecting the purple `Update configuration` to input your password to update the Configuration.